TILBAKE
 KIDS WEAVE! - Tapestry for young people KIDS WEAVE! - Tapestry for young people
av Anne-Kirsti Espenes
Printed in Tapestry Weaver, Issue 12, march 2014
Norges Husflidslag (NH) = ‘The Norwegian Folk Art and Craft Association’ is a more than 100 years old organization whose main task is to maintain, strengthen and continue traditions and skills within the area of folk handicraft. Educational activities are of great importance for NH. Altogether they arrange around 2000 courses a year. In a population of 5 millions, that is quite a lot. The classes cover a wide range of subjects within the main categories textiles, wood work, colour and design.
During the last five years I have had several local and regional tapestry courses arranged by NH. Some of these classes were given to members of NH who teach children. This meant that I had to present tapestry in a way that will suit kids and youngsters.
Ung Husflid = ‘Young Handicraft’ has become a major priority area for NH. A children’s and youth’s coordinator is employed to organize this part of the association. She is also the editor of the website www.unghusflid.no which presents news and lots of photos from recent events and activities. Summer 2013 I was asked by this coordinator to make a contribution for a book published by NH. The title will be Barn vever = ‘Kids Weave’. It will be an instructive publication divided into four parts: Ordinary weaving (shaft loom), card weaving, bead weaving and tapestry.
I was asked to make the chapter on tapestry. What a challenge! I could not say ‘no’.
Instructive photos would of course be a must. Would I manage to take pictures well enough for a book? To avoid using flash, I decided to do the photography outdoors. Having made that decision, implied that that I had to be disciplined and rather quick to avoid photo sessions in snow and freezing temperatures.
Our brand new terrace was an excellent ground for my “outdoor photo studio”, at least until the sun came around the corner just after noon. I am lucky to have my work space next door to our house. My studio is a small house attached to the one we live in, and there is a door connecting the two. With tripod and an average camera with self-timer, I was nearly ready to start. A good background was my first need. Thin cardboard was too shiny. Light grayish Ingres paper turned out to work well. A couple of nails in the wooden house wall was enough to hang the frame on. It all went surprisingly well. Like a slow shuttle I went in and out from my studio. Each time I 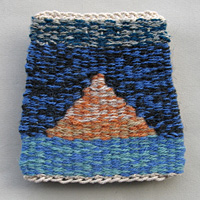 came out through the terrace door, a new step in the process of tapestry making was made on the frame. Extra excitement was added when I had to take photos of hands doing something. Would I literally need a helping hand? With the tripod placed near the wall (literally, the wall within reach) I actually managed to move and “fix” my hands in correct position in the warp after pressing the self-timer and just before the photo was taken. (Still wonder if any of the neighbors saw me. Must have looked weird.) Even these pictures came out well enough. Wow! came out through the terrace door, a new step in the process of tapestry making was made on the frame. Extra excitement was added when I had to take photos of hands doing something. Would I literally need a helping hand? With the tripod placed near the wall (literally, the wall within reach) I actually managed to move and “fix” my hands in correct position in the warp after pressing the self-timer and just before the photo was taken. (Still wonder if any of the neighbors saw me. Must have looked weird.) Even these pictures came out well enough. Wow!
 A reason for me to present this project to BTG is the fact that my way of thinking, doing and teaching tapestry is so British. A few issues back, I made some notes in TW under the headline ‘Teaching Tapestry With A Foreign Accent’, writing about teaching Norwegians the British way of making tapestry. A reason for me to present this project to BTG is the fact that my way of thinking, doing and teaching tapestry is so British. A few issues back, I made some notes in TW under the headline ‘Teaching Tapestry With A Foreign Accent’, writing about teaching Norwegians the British way of making tapestry.
The first classes I had, took place more than six years ago in connection with my first solo exhibition. Groups of 11-12 years old children from schools in the area came to the gallery where there was a spare room excellent for the purpose. I did a thorough job planning those classes. And I dare say that this was paid for by success. Not a single kid of the 40 – 50 boys and girls that came to my classes those three days, left without a self made small tapestry. And they liked it! My worries about impatience and comments like “I tried weaving in kindergarten and that was enough”, was done in vain.
I would like to share some of my experience from teaching tapestry to children, with TW’s readers.
Frame.
Homemade frames sized 65 cm x 55 cm attached to the table by clamps, work well. Masking tape at top and bottom with 1,5 cm between the pencil marks, I find is good spacing for 11-12 years old beginners. This gives ca. 13 warps pr. 10 cm.
Warp.
Thick cotton is very good. Unfortunately this is difficult to get in Norway. Double thin cotton or linen warp is a good alternative.
Weft.
4 plies of wool with thickness 2600 m/kg goes well with the above mentioned warp. The 4 plies can be made of two threads taken double, and we use the bend to start with. A sort of half hitch is made by the double loop. If the loop (before pulling the 4 plies through it) is put behind the warp pointing in opposite direction of the first pass, the starting point will not be seen in the tapestry, and there will be no end to darn in.
Blending.
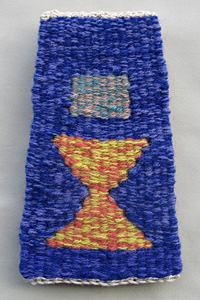
Yes, children love colours. I very much encourage the young weavers to mix shades. They quickly discover that the expression in their work becomes much more alive when they do this. Good fun! Things start happening in the warp! Blending and trying out how colours act and change according to shades and hues put next to them, is one my favorite aspects of tapestry.
Turn backs.
A turn back may be a good way of starting and “warming up” before the actual tapestry making. Just straight weaving with passes from one edge to the other.
Shapes. 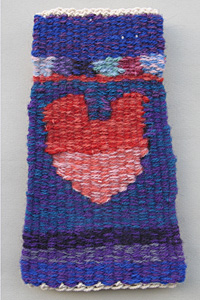
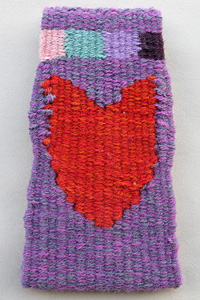
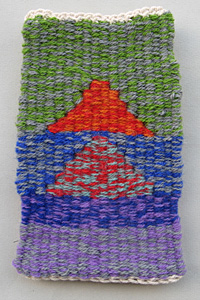
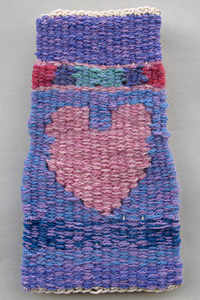
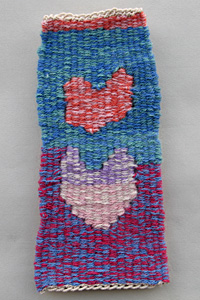
My first tapestry project for young people was called “Zigzag Weave”. Zigzag shapes are made of angular lines which is a good start for new tapestry weavers in all ages. A girl asked if she could develop these lines to a heart. Of course she could! Soon several hearts turned up. In ‘Kids Weave’ I have changed the zigzag to triangles.
Mounting.
I like small tapestries to come a bit out from the wall. This makes them look less like a sampler. Children’s first woven pieces do not have straight angled corners (neither do mine!). Cut out a piece of board with the same shape as the tapestry, but a wee bit smaller, stretch the turn backs around the edges of the board and fasten at the back with a staple gun. Kids may like to cut out the board themselves. If no turn backs were made, use velcro at the front.
 My presentation of tapestry to young people does not suggest much experimentation. It is mainly basic techniques taught in a way that encourages children and teenagers to like it, I am after. My presentation of tapestry to young people does not suggest much experimentation. It is mainly basic techniques taught in a way that encourages children and teenagers to like it, I am after.
The final part of my chapter in ‘Kids Weave’ will show how a small tapestry may turn into a cushion or a bag, by adding fabric to it. Even though the woven edges did not become straight, pieces of fabric can easily be cut so that they fit the shape of the tapestry. Top and bottom woven edges are usually horizontal. It is the width that decreases as you weave. Think “the central part of log cabin patchwork” when fabric is to be attached by sewing machine. The cushion and the bag I have made for 'Kids Weave', came out so well that I think I will continue experimenting in this way later on. Perhaps you too have some woven samplers not really fit for the wall but potentially super for a unique cushion or bag? Don't hesitate! Re-design with small tapestries may be good fun.
Anne-Kirsti Espenes
Bildene av elevarbeidene som er gjengitt i denne artikkelen vil også bli publisert i boka BARN VEVER som gis ut på Norges Husflidslags forlag.
|